Apache for Beginners
Get your website up and running in minutes using Apache.
Setting up a website might be simpler than you think.
Apache is a web server software available on Linux systems. It is one of the most popular web servers on the market, and for good reason. It is free and completely open-source, and also feature-rich, and simple to set up. Today, let’s learn to set up your website using Apache!
Installing Apache
First of all, if you don’t already have Apache on your machine, you’ll have to install it! To install apache2 on a Linux machine, run these two commands:
sudo apt update
sudo apt install apache2
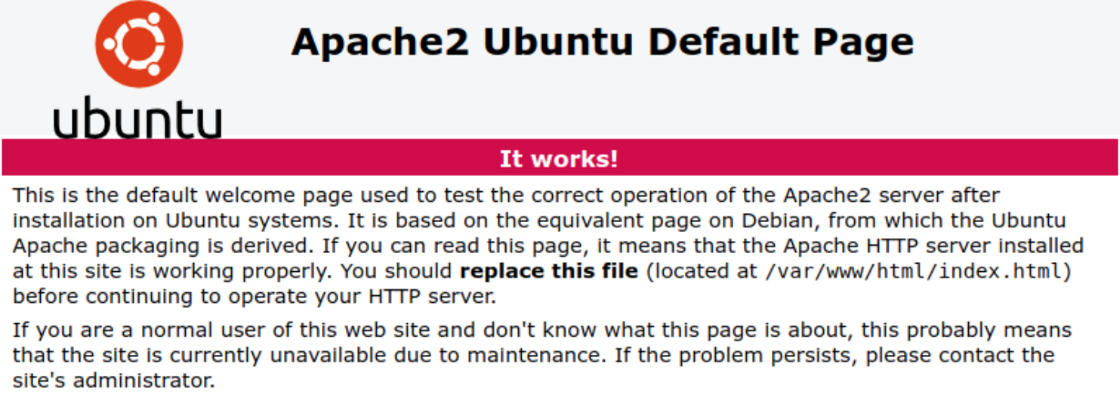
This will automatically install all the required packages for you. And if you didn’t run into any errors, your server should be ready! You can test out your web server by browsing to http://localhost or http://your_ip_address]. You should see a page like this.
Important Files And Directories
Now that you have Apache installed, let’s get familiar with the important files and directories of an Apache server.
Content directory
Apache comes shipped with a basic site, the “It works!” page above. It is located at /var/www/html. This directory contains actual web content that you will serve to your users. If you are only hosting one domain on your server, you can add content straight to this directory.
Server configuration directory
All the files that configure Apache are located in /etc/apache2.
/etc/apache2/apache2.conf is the main configuration file. It contains some global configurations for your server and is responsible for loading other configuration files.
/etc/apache2/ports.conf specifies the ports that Apache will listen on. By default, Apache listens on port 80, and also on port 443 if SSL is enabled.
The /etc/apache2/sites-available/ subdirectory stores the site-specific configuration files for each virtual host. Whereas the /etc/apache2/sites-enabled/ subdirectory stores the sites that have been enabled. When a site is enabled, Apache will read the files in this directory to complete a site’s configuration.
Server logs directory
Apache stores its access logs in /var/log/apache2/access.log and its error logs in /var/log/apache2/error.log
Some Basic Commands
Now, let’s go through some basic commands that you will need to manage your server!
You can enable your Apache site by using the command a2ensite(Apache 2 enable site) and disable it by using a2dissite (Apache 2 disable site).
sudo a2ensite YOUR_DOMAIN.conf
sudo a2dissite YOUR_DOMAIN.conf
Where YOUR_DOMAIN is the name of your site’s virtual host configuration file, minus the “.conf” extension. We’ll see an example of this later!
To start or stop your Apache server, you can run:
sudo systemctl start apache2
sudo systemctl stop apache2
You can also restart your server in one command using:
sudo systemctl restart apache2
Sometimes, when you make configuration changes and don’t want your server to be restarted, you can try reloading the server instead of restarting.
sudo systemctl reload apache2
Setting Up Virtual Hosts
What if you want to host multiple websites on the same server? Virtual hosts let you do that. They are a method for multiple domain names to use the same physical server and share computational resources.
First, if you want to host multiple sites on the same server, you probably won’t want to store all your web content in /var/www/html. You could create a separate directory for each one of your domains. Let’s say that we are creating a site with the domain name “mysite.com”.
sudo mkdir /var/www/mysite.com
You can then fill web content for that domain in the domain-specific directory. This command creates an empty index file for your site.
sudo touch /var/www/mysite.com/index.html
The contents of that index file could be as simple as:
<html>
    <body>
        <h1>This is your index page :) </h1>
    </body>
</html>
For Apache to serve your content, it will need configuration files for this specific domain. So you need to create a configuration file named “YOUR_DOMAIN.conf” in the “sites-available” directory.
sudo touch /etc/apache2/sites-available/mysite.com.conf
Apache comes with a default configuration file located at /etc/apache2/sites-available/000-default.conf. You can copy the contents over and make modifications.
<VirtualHost *:80>
    ServerAdmin admin@mysite.com
    ServerName mysite.com
    DocumentRoot /var/www/mysite.com
    ErrorLog ${APACHE_LOG_DIR}/error.log
    CustomLog ${APACHE_LOG_DIR}/access.log combined
</VirtualHost>
The “DocumentRoot” line specifies the location of the web content used for this site. And the “ServerName” line specifies what users should type in the address bar to reach your site. Finally, you should put your email address in the “ServerAdmin” line so that your users would have someone to contact when they experience issues with the site.
Now you are all done configuring your site! Simple, right? When your site is ready, you can enable it by running:
sudo a2ensite mysite.com.conf
It’s also a good idea to disable the default site that came with Apache:
sudo a2dissite 000-default.conf
Finally, check for configuration errors and reload Apache to finalize your changes.
sudo apache2ctl configtest
sudo systemctl reload apache2
Hurray! Now when you browse to http://YOUR_DOMAIN, you should see an HTML page that says:

Your site is now running and ready to serve the Internet.