Intro To Wireshark
How to use Wireshark to capture network traffic.
If you are a computer network or security enthusiast, you’ve probably heard of Wireshark. Wireshark is the world’s most popular network protocol analyzer. It lets you dive into captured traffic and analyze what is going on within a network. You can use it to diagnose network issues and find network vulnerabilities.
In this article, we will go through some basics of capturing traffic with Wireshark. Since we will go through some examples, feel free to use a PCAP file to follow along! Head to the Wireshark wiki to find some sample capture files.
Working With PCAP Files
After you open up Wireshark, it will start capturing traffic on multiple network interfaces. You can double-click on an interface to see traffic details:

You should see packets listed in the Wireshark window like this:
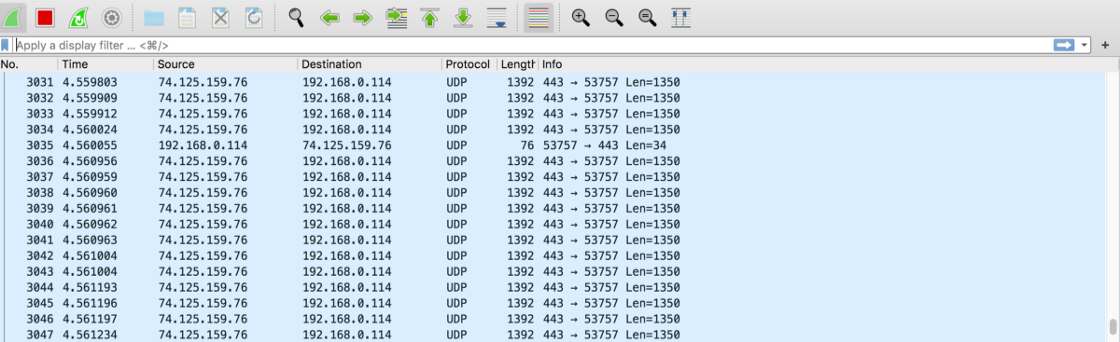
You can save the captured packets by first clicking on the red square button on the top toolbar:

This will tell Wireshark to stop capturing packets. Then, go to “File > Save” to save the PCAP file. PCAP stands for “Packet CAPture” and is the file extension used for Wireshark capture files. You might also see the extension “PCAPNG,” which stands for “PCAP Next Generation” and is a new version of the PCAP file format.
Later when you want to revisit the traffic capture, you can go to “File > Open” to import a saved PCAP file.
Remote Capture
What if you wanted to capture and analyze traffic on a remote server? Wireshark is usually used to analyze traffic on your local network, so you would need to use a tool like tcpdump.
First, SSH into the remote machine with an account with root access:
ssh remoteuser@remotehost
Next, use tcpdump to capture the traffic on the remote network and save it into a PCAP file:
sudo tcpdump -i eth0 -w tcpdump.pcap
Finally, copy the capture file to your computer by using the scp command:
scp remoteuser@remotehost:tcpdump.pcap /some/local/directory
You can now open up the remote capture file by using Wireshark on your computer.
Alternatively, you can use Wireshark’s remote capture tool sshdump. This command is functionally equivalent to the commands above:
sshdump --extcap-interface=sshdump --capture--remote-host remotehost --remote-username remoteuser--fifo=/some/local/directory/tcpdump.pcap
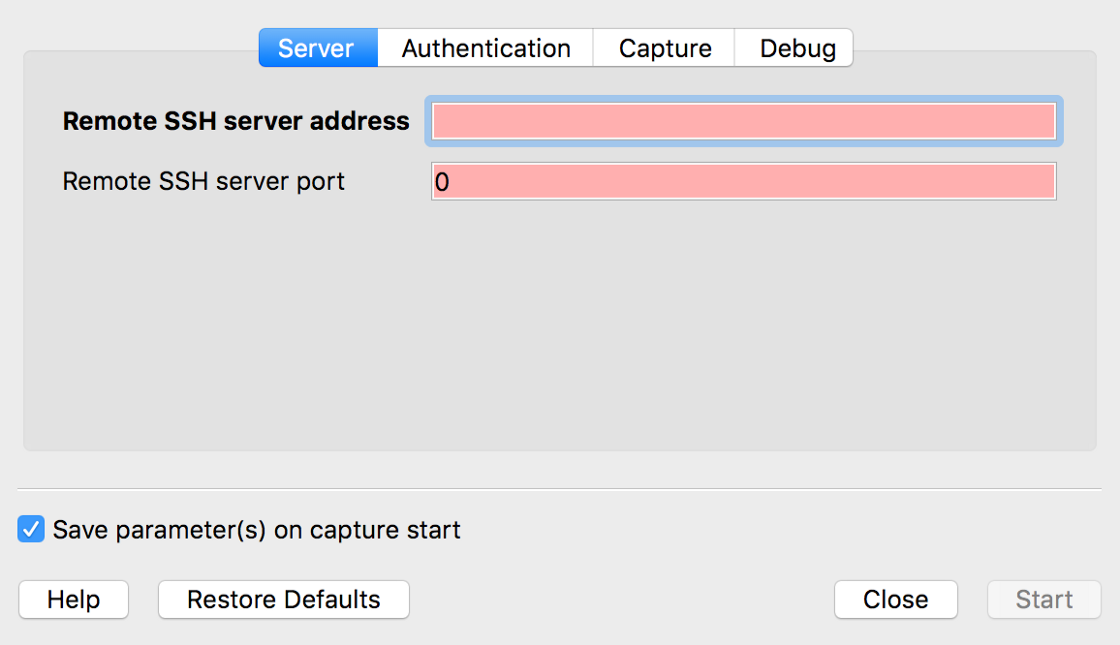
You can also use sshdump directly in Wireshark’s GUI. Access sshdump by scrolling down the interfaces list on the startup screen and double-click on “SSH remote capture: sshdump”:

From this dialog, you can specify the remote server, port, interface, username, and password:
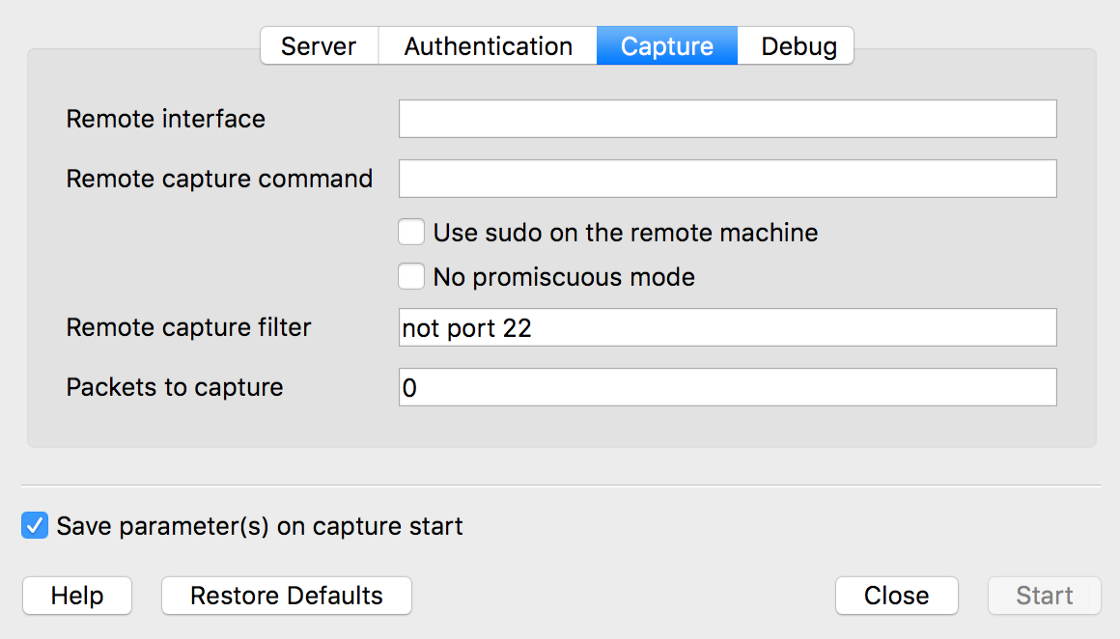
You can also specify capture filters and capture commands. Be sure to check the “Use sudo on remote machine” option!
Capture Filters
You can use Wireshark’s capture filters to reduce the size of your capture files. Capture filters enable you to leave out packets that you are not interested in during a capture. In Wireshark’s startup window, you can see the capture filter above the interfaces list:

You can filter packets based on criteria like IP addresses, port numbers, and protocol. For example, you can use a “host” filter to focus on traffic to and from a target host:
host 74.125.5.4 (Captures all traffic to and from host.)
dst host 74.125.5.4 (Captures all traffic to host.)
src host 74.125.5.4 (Captures all traffic from host.)
You can also filter according to source and destination ports:
port 80 (Captures all traffic to and from port.)
dst port 80 (Captures all traffic to port.)
src port 80 (Captures all traffic from port.)
Finally, you can use filters to exclude packets as well:
not port 80 (Captures all packets that do not use port.)
You can find more useful capture filters on the wiki.
Display Filters
On the other hand, you can use display filters to leave out packets you do not want to see in the Wireshark window. Display filters do not affect the PCAP file but allow you to see only certain packets during your analysis. You can see the display filter in Wireshark’s window above the packets list:

For example, you can tell Wireshark to display or exclude packets with certain source and destination IPs:
ip.src==74.125.5.4 and ip.dst==192.168.0.1
ip.src!=74.125.5.4
You can also filter based on protocol:
udp or icmp
Or filter packets based on content by using the contains filter. This filter will display packets that contain the three-byte sequence 0x81, 0x60, 0x03 anywhere in the UDP header or payload:
<host or protocol> contains <expression>
udp contains 81:60:03
Finally, you can combine filters using boolean expressions like and or or:
tcp.port==80 or udp
You can find more useful display filters on the wiki.
Conclusion
Thanks for reading! This article only introduces a small fraction of what you can do with Wireshark. It is a versatile tool that is capable of performing many different types of analysis.
If you are interested in learning more about Wireshark, visit its documentation here: Wireshark Wiki.